Cable, Parking Brake, Rear: Installation
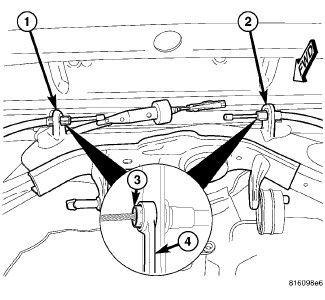
- Route leading end of rear parking brake cable (2) up through cable guide (1) on crossmember.
- Guide cable leading end through crossmember bracket (1 - left) (2 - right) near equalizer and press cable housing retainer into bracket allowing retainer fingers to lock cable in place.
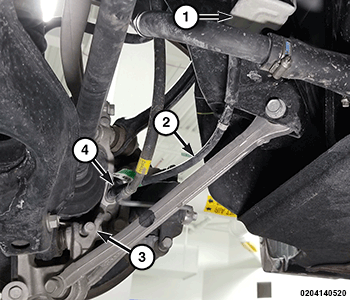
- Insert opposite end of cable (2) through rear knuckle (3) and install the Parking Brake Cable to Knuckle Bolt (4). Tighten to the proper torque specifications. Refer to TORQUE SPECIFICATIONS .
- Install parking brake shoes as well as all components necessary to access them. Refer to SHOES, PARKING BRAKE, INSTALLATION .NOTE:
Due to short travel and low spring tension, it is not necessary to lock out parking brake lever to service parking brake components.
- Connect rear parking brake cable at equalizer/front cable as follows:
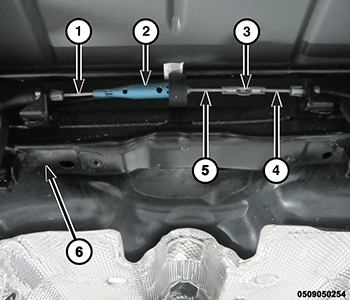
- If installing left rear cable, connect cable (1) at equalizer (2) above rear axle differential (not shown) and rear crossmember (6).
- If installing right rear cable, connect cable (4) at connector (3) above rear axle differential (not shown) and rear crossmember (6).
- Remove the support and lower the vehicle until rear wheels are just above floor level.
- Apply parking brake lever. Release lever, then reapply.
- Check to make sure rear wheels will not rotate with lever applied.
- Release parking brake lever, then check to make sure rear wheels rotate without excessive drag.
- Adjust parking brake shoes as necessary. Refer to SHOES, PARKING BRAKE, ADJUSTMENTS .
- Remove support and lower the vehicle.