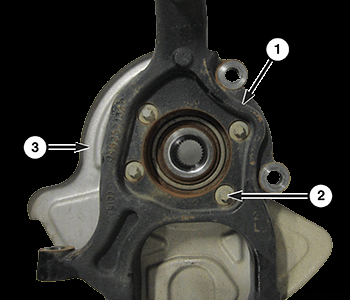
Knuckle, Steering, AWD: Removal
NOTE:
Left side shown in illustration, right side similar.
- Raise and support the vehicle. Refer to HOISTING, STANDARD PROCEDURE .
- Remove the tire and wheel assembly. Refer to REMOVAL
.
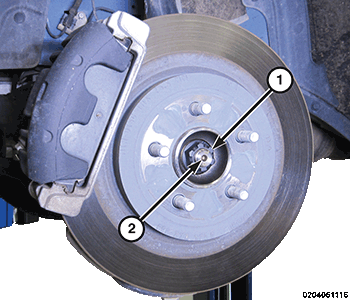
- Remove the hub nut (1) from the axle shaft (2).
- Remove the front brake rotor. Refer to ROTOR, BRAKE, REMOVAL
.
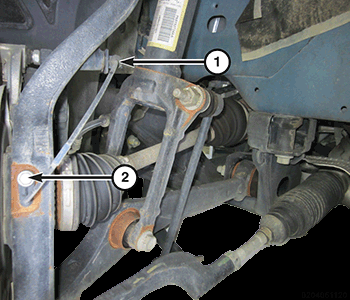
- Remove clip (1) fastening wheel speed sensor to knuckle.
- Remove screw (2) fastening wheel speed sensor to knuckle. Pull sensor head out of knuckle.
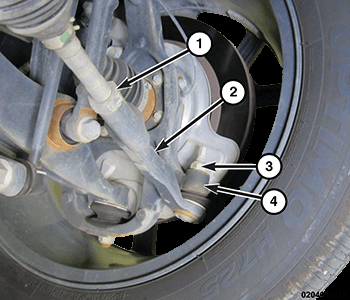
- Remove the outer tie rod end to knuckle nut (3).
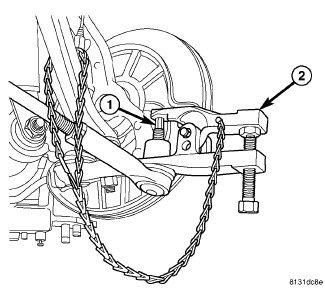
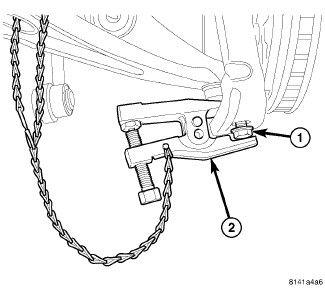
- Using Puller (2), Special Tool (special tool #9360, Remover, Ball Joint), separate tie rod stud (1) from knuckle.
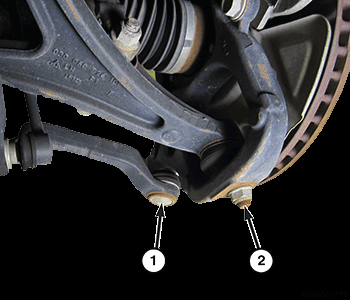
- Loosen the lower control arm to knuckle nut (2). Back nut off until nut is even with end of stud. Keeping nut on at this location will help keep end of stud from distorting while using Puller in next step. CAUTION:
In following step, use care not to damage ball joint seal boot while sliding Puller, Special Tool, into place past seal boot.
- Using Puller (2), Special Tool (special tool #9360, Remover, Ball Joint), separate ball joint stud from knuckle.
- Remove tool.
- Remove nut (1) from end of ball joint stud.
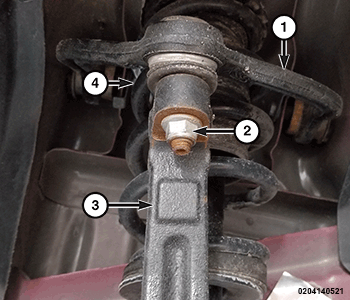
- Loosen the upper control arm to knuckle nut (2). Back nut off until nut is even with end of stud. Keeping nut on at this location will help keep end of stud from distorting while using Puller in next step. CAUTION:
In following step, use care not to damage ball joint seal boot while sliding Puller, Special Tool, into place past seal boot.
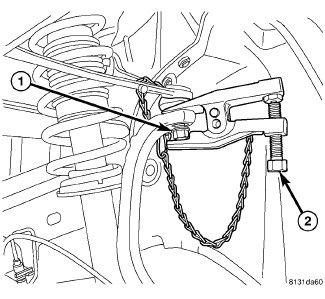
- Using Puller (2), Special Tool (special tool #9360, Remover, Ball Joint), separate upper ball joint stud (1) from knuckle.
- Remove tool.
- Remove nut (1) from end of upper ball joint stud.
- Slide knuckle off the half shaft and remove from vehicle.
- If hub and bearing and dust shield need to be removed:
- Remove the four hub and bearing to knuckle bolts (2).
- Slide hub and bearing out of knuckle along with shield.