Engine Mount Isolators
NOTE:
Left side shown, right side similar.
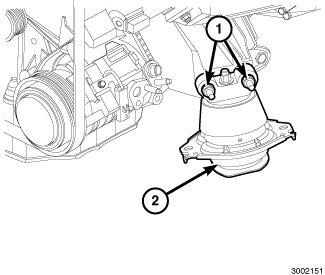
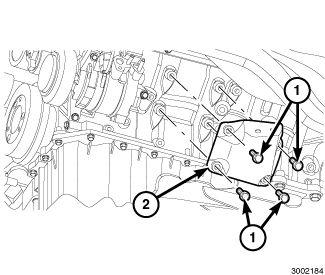
- If removed, install the engine mount bracket(s). Tighten bolts (1) to the proper specification. Refer to TORQUE SPECIFICATIONS
.NOTE:
Left side shown, right side similar.
- Install the engine mount(s) (2). Tighten bolts (1) to the proper specification. Refer to TORQUE SPECIFICATIONS .
- Remove support and lower the vehicle.
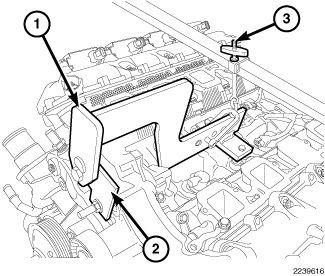
- Using the Engine Lift Fixture (special tool #8984B, Fixture, Engine Lifting) (1), Engine Lift Adapter (special tool #8984-UPD, Adapter, Engine Lift) (2) and the Engine Support Fixture (special tool #8534C, Fixture, Driveline Support) (3), lower the engine until the engine mounts are seated on the engine cradle.
- Remove the Engine Lift Fixture (special tool #8984B, Fixture, Engine Lifting) (1), Engine Lift Adapter (special tool #8984-UPD, Adapter, Engine Lift) (2) and the Engine Support Fixture (special tool #8534C, Fixture, Driveline Support) (3).NOTE:
Left side shown, right side similar.
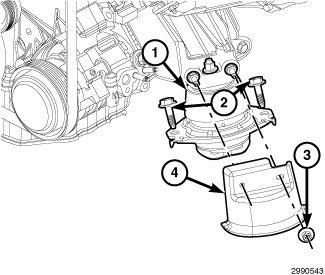
- Install both left/right engine mount to cradle bolts (2) and tighten to the proper specification. Refer to TORQUE SPECIFICATIONS .
- Install both left/right engine mount heat shields (4). Tighten nuts (3) to the proper specification. Refer to TORQUE SPECIFICATIONS
.
- Raise and support the vehicle.
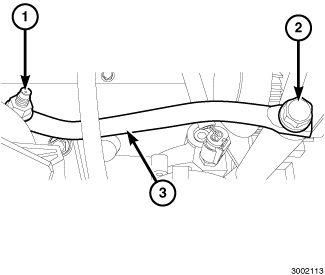
- Tighten the generator support bracket (3). Tighten fasteners (1, 2) to the proper specification. Refer to TORQUE SPECIFICATIONS
.
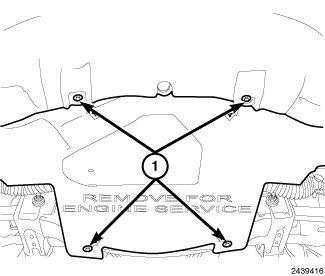
- Install the belly pan and the retainers (1).
- Remove support and lower the vehicle.
- Install the engine oil dipstick tube and securely tighten nut.
- Install the Variable Valve Timing Solenoid. Refer to SOLENOID, VARIABLE VALVE TIMING (VVTS), EXHAUST, INSTALLATION .
- Connect the negative battery cable.