Pan, Oil: Installation
WARNING: This page is about a different variant/trim than selected.
NOTE:
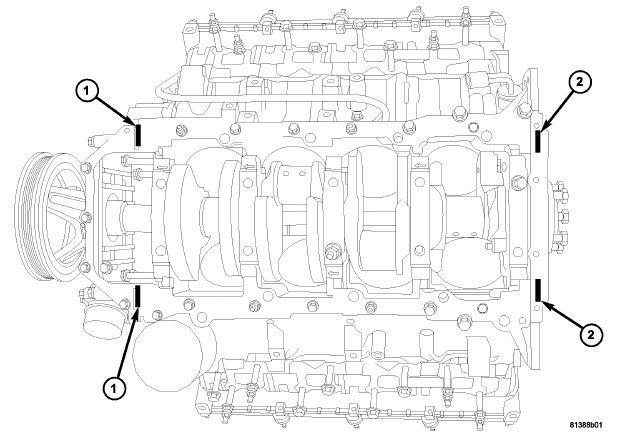
Mopar® Engine RTV must be applied to the 4 T-joints, the area where the front cover, rear retainer and oil pan gasket meet. The bead of RTV should cover the bottom of the gasket. This area is approximately 4.5 mm x 25 mm in each of the 4 T-joint locations.
- Clean the oil pan gasket mating surface of the engine block and oil pan.
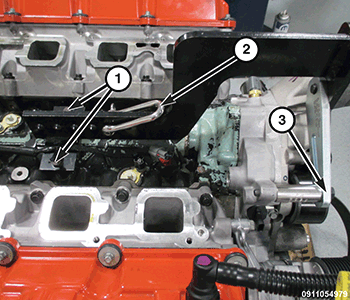
- Apply Mopar® Engine RTV at the 4 T- joints (1, 2).NOTE:
When the oil pan is removed a NEW oil pan gasket and the integral windage tray assembly must be installed, the old gasket cannot be reused.
- Install a NEW oil pan gasket/windage tray.
- Using a NEW O-ring, position the oil pump pickup tube into the oil pump.
- Install the oil pump pickup tube retaining bolt and nut and tighten to the proper specification. Refer to TORQUE SPECIFICATIONS
.
NOTE:
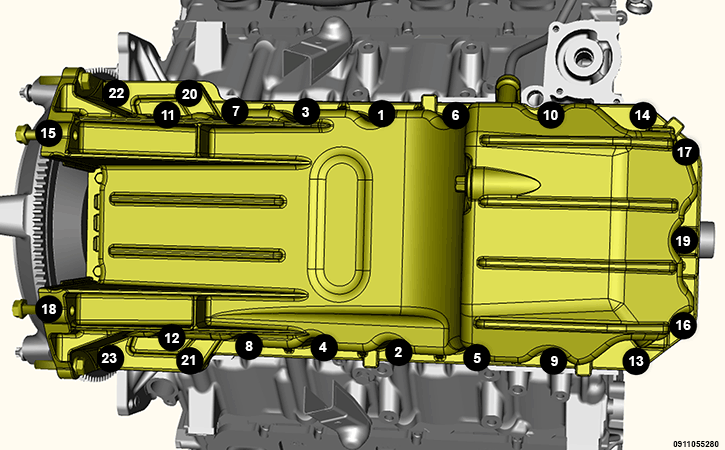
The horizontal M10 retaining bolts (11, 12, 15, 18) are 5 mm longer in length then the vertical M10 retaining bolts (20, 21, 22, 23) and must be reinstalled in their original locations.
NOTE:NEW M6 retaining bolts must be used when reinstalling the oil pan. Do not reuse the old M6 retaining bolts.
- Align the rear of the oil pan with the rear face of the engine block and install the M10 and M6 retaining bolts finger tight.
- Using the sequence shown, tighten the M6 retaining bolts to 5 N.m (44 in. lbs.).
- Using the sequence shown, tighten the M10 retaining bolts to 54 N.m (40 ft. lbs.).
- Using the sequence shown, tighten the M6 retaining bolts to 12 N.m (9 ft. lbs.).
- Lower the vehicle.
- Using the Engine Lift Fixture (special tool #8984B, Fixture, Engine Lifting) (1), Engine Lift Adapter (special tool #8984-UPD, Adapter, Engine Lift) (3) and the Engine Support Fixture (special tool #8534C, Fixture, Driveline Support) (2) lower the engine into position and remove.
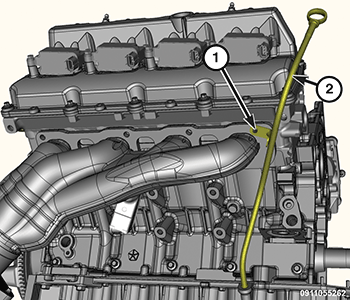
- Install the engine oil dipstick tube and dipstick.
- Raise and support the vehicle. Refer to HOISTING, STANDARD PROCEDURE
.
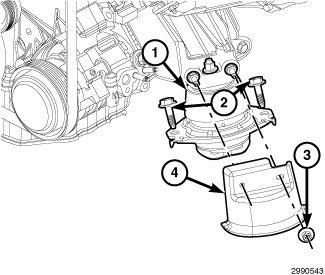
- Install both engine mount lower retaining bolts (2) and tighten to the proper specification. Refer to TORQUE SPECIFICATIONS .
- Position both engine mount heat shields (4) and install retaining nuts (3).
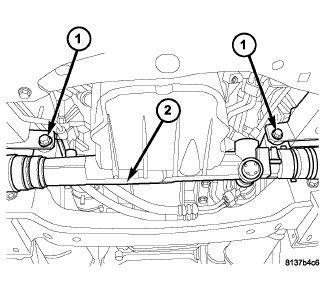
- Position the steering gear (2), install mounting bolts (1) and tighten to the proper specification. Refer to TORQUE SPECIFICATIONS .
- Lightly lubricate the oil filter gasket with clean engine oil.NOTE:
Do not over tighten the oil filter.
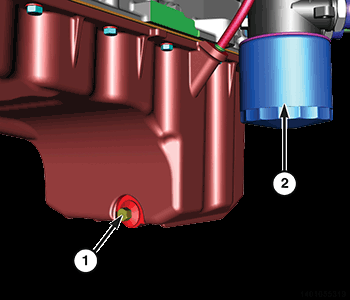
- Install the oil pan drain plug (1) and tighten to the proper specification. Refer to TORQUE SPECIFICATIONS .
- Thread the oil filter (2) onto the oil filter adapter.
- When the oil filter gasket makes contact with the oil cooler sealing surface, hand tighten the oil filter one half turn, or 180°.
- Install the oil dipstick and tube (2) into the oil pan and tighten the fastener to the proper specification. Refer to TORQUE SPECIFICATIONS
.
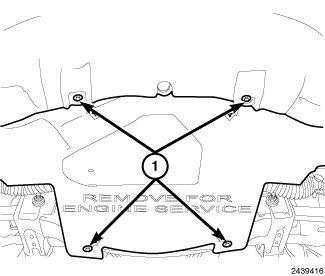
- Position the belly pan to the under side of the vehicle and install the belly pan retainers (1).
- Lower the vehicle.
- Install the supercharger assembly. Refer to SUPERCHARGER, INSTALLATION .
- Fill the engine with oil. Refer to OIL .
- Connect the negative battery cable.
- Start the engine and check for leaks.