Half Shaft
This procedure requires the compression of the rear suspension to ride height. A drive-on hoist should be used. If a drive-on hoist is not used, screw-style under-hoist jack stands are required to compress the rear suspension, facilitating rear halfshaft removal.
The halfshaft inner and outer boots are not serviceable separately. Boot replacement requires entire halfshaft assembly replacement.
Never grasp halfshaft assembly by the inner or outer boots. Doing so may cause the boot to pucker or crease, reducing the service life of the boot and joint. Avoid over angulating or stroking the C/V joints when handling the halfshaft.
- Raise and support the vehicle. Refer to HOISTING, STANDARD PROCEDURE .
- Remove the rear exhaust system. Refer to MUFFLER, EXHAUST, REMOVAL .
- Remove the tire and wheel assembly. Refer to REMOVAL
.
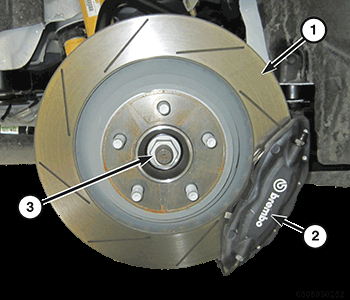
- Remove the hub nut (3) and discard.
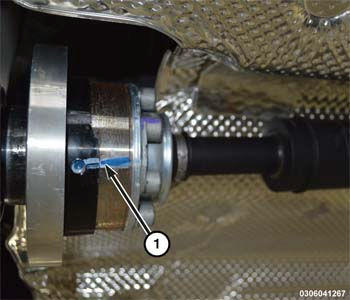
- Apply alignment index marks (1) to the drive shaft and axle flanges (1).NOTE:
The use of soft/blunt tools is recommend for removal of joints from the companion flanges. Use of sharp pry tools, such as a screwdriver, will damage the joint housing and could result in driveline imbalance.
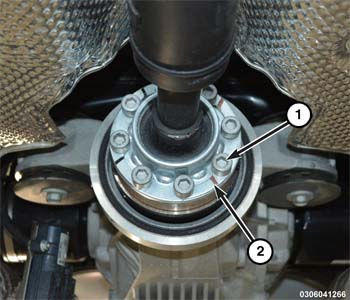
- Remove and discard the drive shaft to axle flange bolts (1). Remove the washers (2) and separate the drive shaft from the rear axle.NOTE:
Do not let the drive shaft hang unsupported, damage may occur to the shaft.
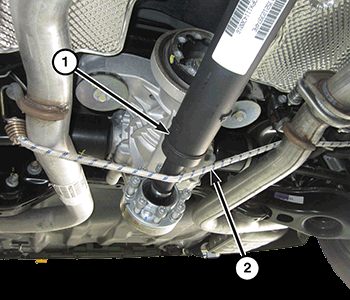
- Support the drive shaft (1) with a strap (2) or equivalent.NOTE:
Do not damage the axle seal, axle seal dust cover, and halfshaft boot.
NOTE:Left Hand (LH) side shown in illustration, Right Hand (RH) side similar.
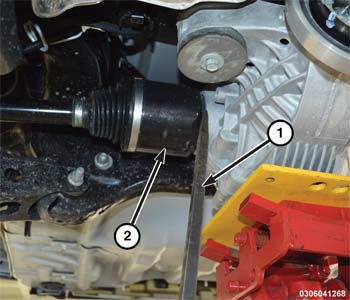
- Using a suitable screwdriver (1), partially disengage the halfshaft (2) from the rear axle assembly.
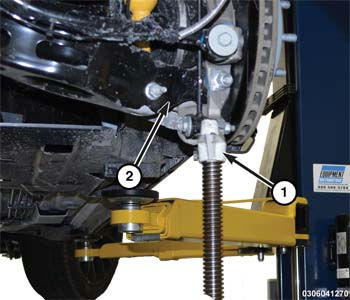
- If a drive-on hoist is not used, compress the rear suspension (2) using a screw-style under-hoist jack stand (1).
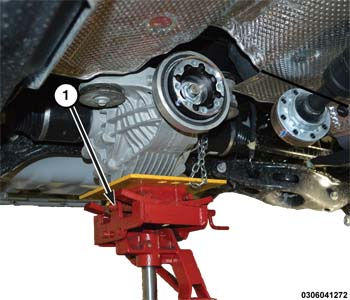
- Position the transmission jack (1) under the rear axle assembly.
- Remove and discard the rear axle forward mount isolator bolts (1).
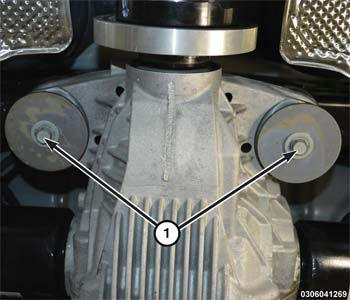
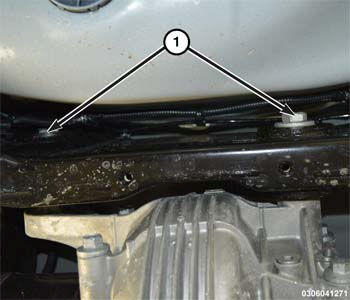
- Remove the two rear axle to crossmember bolts (1) from the rear axle.NOTE:
Left Hand (LH) side shown in illustration, Right Hand (RH) side similar.
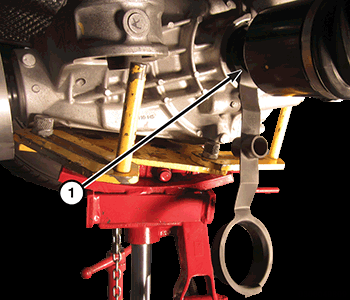
- Install the Protector, Half Shaft, Drive (special tool #10270, Protector, Half Shaft, Drive) (1).NOTE:
Left Hand (LH) side shown in illustration, Right Hand (RH) side similar.
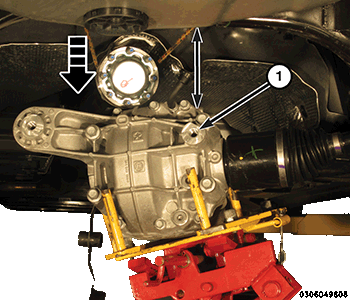
- Lower the rear axle (1) approximately six inches and push the rear axle assembly towards the front of the vehicle.CAUTION:
Never grasp halfshaft assembly by the inner or outer boots. Doing so may cause the boot to pucker or crease, reducing the service life of the boot and joint. Avoid over angulating or stroking the C/V joints when handling the halfshaft.
CAUTION:Use care while handling/storing halfshaft assembly. Damage to the slinger can result from improper handling. If slinger gets bent or damaged, straighten slinger to avoid contact with axle seal assembly.
NOTE:Do not allow the halfshaft splines to come in contact with the axle seal.
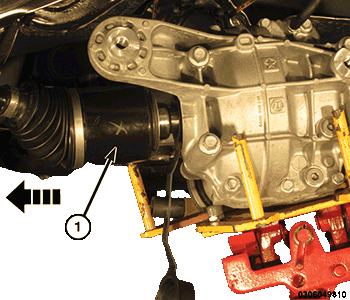
- With the aid of an assistant, shift the rear axle assembly in one direction and compress one halfshaft inner joint as far as possible while removing the other halfshaft (1).
- Remove the halfshaft from the hub and the vehicle.