Pinion Seal
- Clean any thread locker from pinion flange nut and the pinion shaft.
- Apply light coating of gear lubricant to the outer diameter of the flange on the sealing surface.
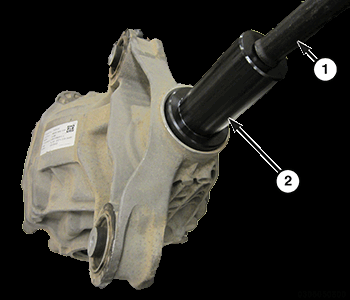
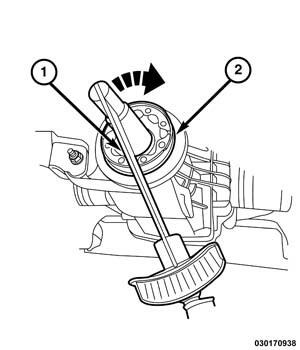
- Using Driver Handle (special tool #C-4171, Driver Handle, Universal) (1) and Installer (special tool #10269, Installer, Seal) (2), install the pinion seal until tool bottoms on the carrier.
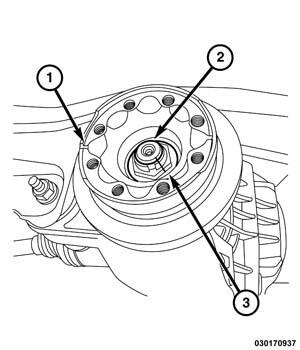
- Install the pinion flange into position. Align the alignment index marks (3) made during removal.
- Using (special tool #6448A, Installer, Bearing/Gear), lightly tap on the pinion flange (1) until adequate pinion shaft threads are exposed.
- Apply Mopar® Lock and Seal Adhesive Loctite 2701 to the pinion nut (2) and install the pinion flange nut. Apply axle grease to pinion nut washer face prior to assembly.
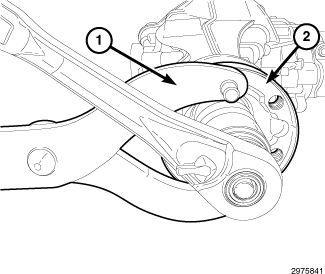
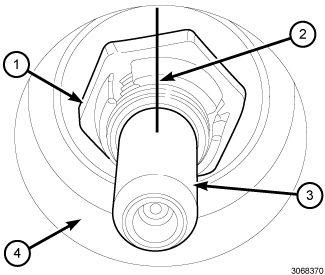
- Using Flange Holder (special tool #C-3281, Holder, Flange) (1) and 32mm socket tighten the pinion flange nut in small increments until the pinion nut index mark aligns with the index mark on the pinion shaft.NOTE:
If the pinion nut alignment index mark exceeds the pinion shaft alignment index mark the unit must be discarded. If the pinion nut alignment index mark falls short of the pinion shaft alignment index mark the unit will possibly generate an Noise, Vibration, or Harshness (NVH) concern.
NOTE:Torque reading must be taken with a constant rotational speed. Do not measure break away torque.
- Using a torque wrench (1), measure and record the pinion rotational torque.
- After the torque reading has been obtained, compare the reading to the recorded reading when removing the pinion flange. The difference in the reading should be within 0 ± 0.2 N.m (0 ± 1.7 in. lbs.). Value after repair should be higher due to tighter fit of the new pinion seal.
- Install the rear axle assembly. Refer to INSTALLATION .