Valve Body: Removal
WARNING: This page is about a different variant/trim than selected.
CAUTION:
The Transmission Control Module (TCM), or Transmission Control Module Assembly (TCMA) is extremely sensitive to Electrostatic Discharge (ESD). Always use a ground strap and follow the ESD guidelines in ELECTROSTATIC DISCHARGE (ESD) SENSITIVE DEVICES. Failure to follow these instructions may result in damage to the TCM/TCMA.
- Raise and support the vehicle. Refer to HOISTING, STANDARD PROCEDURE .
- Remove the transmission fluid pan drain plug and allow the transmission fluid to drain.
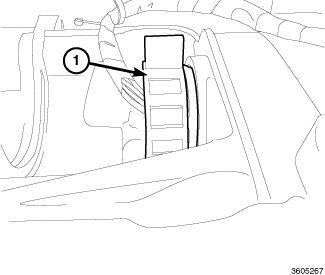
- Turn the locking mechanism lock (1) of the adapter plug counter-clockwise and disconnect the wire harness connector from the transmission.
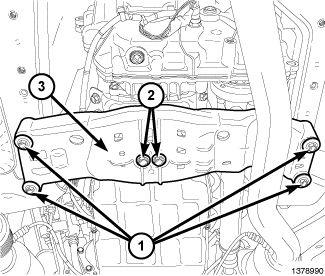
- For All Wheel Drive (AWD) vehicles , support the transmission and remove the rear support bolts (2), the crossmember to body bolts (1) and the crossmember (3).
- For All Wheel Drive (AWD) vehicles
Remove the two steering gear to crossmember bolts and allow the steering gear to slightly roll out of the way of the transmission fluid pan bolts.
- All Vehicles
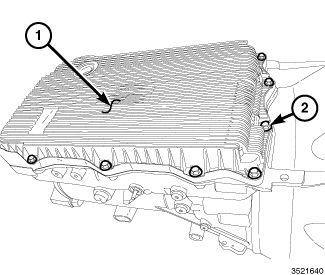
Remove the 13 transmission fluid pan retaining bolts (2).NOTE:
Inspect the gasket for reuse. If the seal is cut or torn, replace the gasket.
- Remove the transmission fluid pan (1) and gasket.
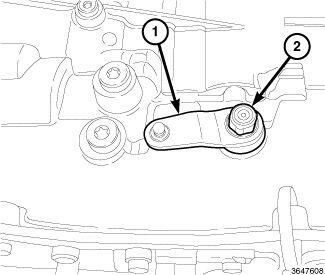
- Remove the manual control lever retaining nut (2) and remove the lever (1).
- Reinstall the manual shift shaft lever 180 degrees offset. Using a tie strap, secure the lever into position so the park release fork remains in the same position for installation of the valve body assembly.
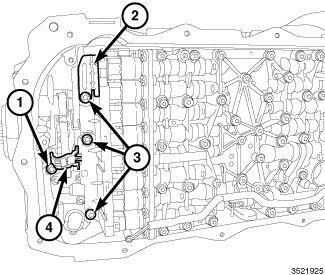
- Remove the valve body assembly end retainer bolts (3).
- Lift the electrical connector lock (2) to release the internal harness end from inside the transmission for valve body assembly removal.
- Remove the sensor retaining bolt (1) and pull the sensor (4) loose from the case.
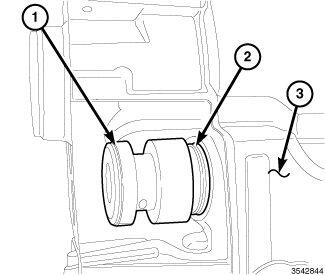
- Using (special tool #10377, Remover/Installer, Guide Sleeve) (1) carefully pull the electrical harness insulator (2) straight out from the transmission case (3).
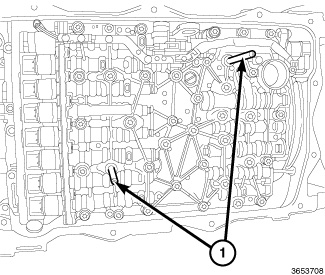
- Remove two bolts and hand install (special tool #10379, Pins, Valve Body Alignment) (1).
- Use an appropriate tool on one of the alignment pins to assist in holding the valve body in position while removing the remaining fasteners.
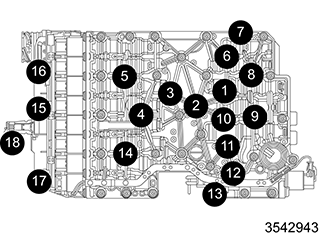
- Remove remaining valve body assembly retaining bolts.
- Carefully lower the valve body assembly from the transmission.NOTE:
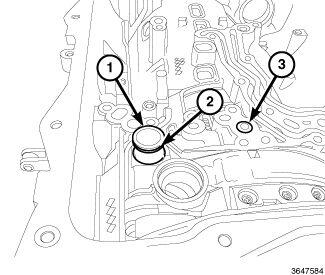
The fluid port may remain in the valve body upon removal, remove and discard the O-rings.
- Remove the fluid transfer port (1) from the transmission.
- Remove and discard the O-ring (2) and seal (3).