Link, Camber: Installation
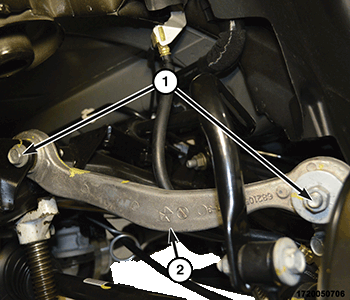
- Position the camber link (2) into the bracket on the crossmember. Install the camber link to crossmember bolt (1). Do not tighten the bolt at this time.
- Position the camber link (2) into the knuckle. Install the camber link to knuckle bolt (1). Do not tighten the bolt at this time.
- The rear crossmember bolts are longer than the front crossmember bolts. Install them in the original positions.
Install the crossmember bolts. Do not fully tighten bolts at this time.
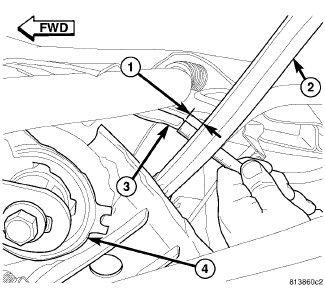
- Measure the tension link clearance as follows:
- Measure the distance (1) from tension link (2) to body weld flange (3) directly in front of it, just outboard of front mount bushing (4). This distance must be at least 12 mm to allow proper clearance for suspension movement. If distance is less than 12 mm, shift that side of rear crossmember directly rearward until distance is 12 mm or greater. To adjust, loosen three crossmember mounting bolts slightly, leaving one on opposite side of shift snugged to pivot from. Shift the crossmember rearward and snug the loosened bolts. Measure opposite side to be sure it has maintained a minimum 12 mm distance.
- Tighten the crossmember bolts to the proper torque specifications. Refer to TORQUE SPECIFICATIONS .
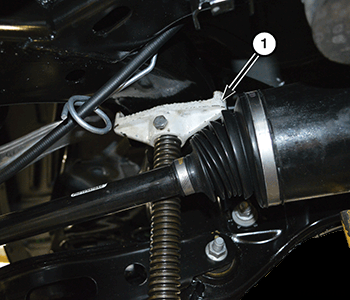
- Remove the support (1) from the crossmember.
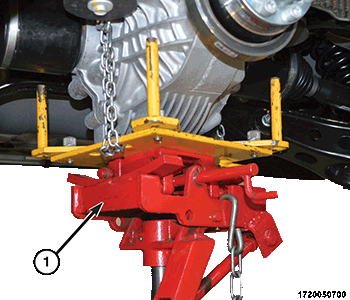
- Remove the support from the rear axle differential.
- Install the rear exhaust. Refer to MUFFLER, EXHAUST, INSTALLATION .
- For left hand side camber link service, install the fuel filler tube. Refer to TUBE, FUEL TANK FILLER, INSTALLATION
.
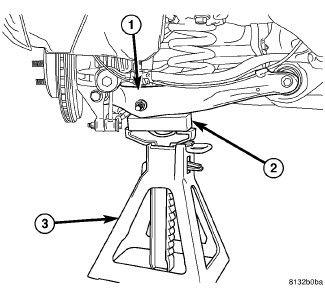
- Lower the vehicle until the front tires contact floor but the rear tires are still suspended. Place jack stands with wooden blocks under each rear suspension spring link. Lower the vehicle until the full weight is supported by the suspension.
- Tighten the camber link to the crossmember bolt to the proper torque specifications. Refer to TORQUE SPECIFICATIONS .
- Tighten the camber link to the knuckle bolt to the proper torque specifications. Refer to TORQUE SPECIFICATIONS .
- Raise the vehicle and remove the jack stands.
- Install the tire and wheel assembly. Refer to INSTALLATION .
- Carry out a wheel alignment. Refer to WHEEL ALIGNMENT, STANDARD PROCEDURE .