Shock Absorber, Suspension, Coil-Over: Disassembly
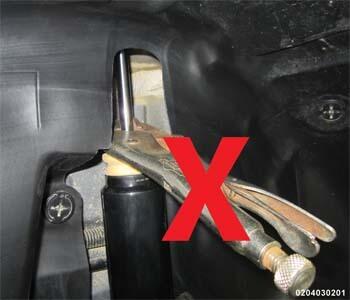
Do not use any type of pliers on the chrome machined surface of shock/strut rod to assist in the disassembly/assembly of shocks or struts. Use only tools designed to hold the shock/strut rod stationary when servicing shock or strut components.
The shock assembly must be removed from vehicle for it to be disassembled and assembled.
For shock assembly disassembly and assembly, use of shock Spring Compressor, Mopar Service Equipment (MSE) tool W-7200, or equivalent, is recommended to compress coil spring. Follow manufacturer's instructions closely.
Do not remove shock shaft nut before coil spring is compressed. Coil spring is held under pressure and must be compressed, removing spring tension from upper and lower mounts, before shock removal.
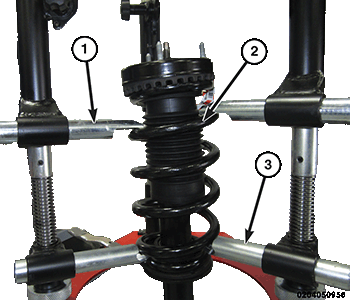
- Position shock assembly coil spring (2) on hooks (1, 3) of the compressor following manufacturers instructions. Install clamp securing shock to the upper and lower spring coil. To ease installation, rotate shock as necessary positioning shock in compressor so that upper spring coil ends (step in upper mount) at straight outward position from compressor.
- Compress coil spring (2) until all spring tension is removed from upper mount.
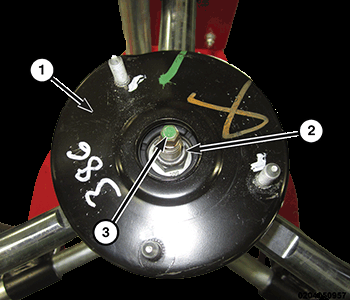
- Using the appropriate tool, remove the shock absorber shaft nut (3).
- Remove clamp from bottom of coil spring and remove shock and lower isolator out through bottom of coil spring.
- Remove upper mount (1) from shock shaft and coil spring if replaced is necessary.NOTE:
Prior to removing spring from compressor, note location of lower spring coil end in relationship to compressor to ease assembly of components later.
- Back off compressor drive, releasing tension from coil spring. Push back compressor upper hooks and remove coil spring from compressor.
- Remove jounce bumper from shock shaft by pulling straight up and off.
- Remove lower isolator (4) from shock body by pulling straight up and off shock shaft.
- Inspect shock assembly components for following and replace as necessary:
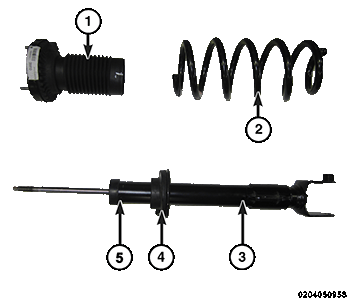
- Inspect shock (3) for any condition of shaft binding over full stroke of shaft.
- Inspect upper mount (1) for cracks and distortion and its retaining studs for any sign of damage.
- Inspect upper spring isolator (1) for severe deterioration.
- Inspect lower spring isolator (4) for severe deterioration.
- Inspect dust shield for tears and deterioration.
- Inspect coil spring (2) for cracks in the coating and corrosion.
- Inspect jounce bumper for cracks and signs of deterioration.