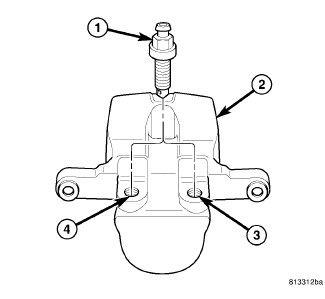
Caliper, Disc Brake, Rear: Assembly
CAUTION:
Dirt, oil, and solvents can damage caliper seals. Ensure assembly area is clean and dry.
NOTE:
Always use new, clean Mopar® DOT 3 Motor Vehicle Brake Fluid or equivalent when assembling brake caliper.
NOTE:
Never use used or old piston seals or boots for reassembly.
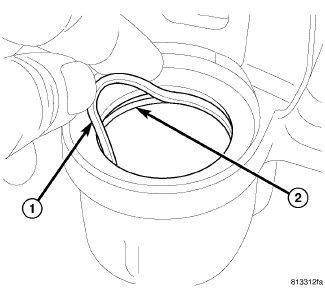
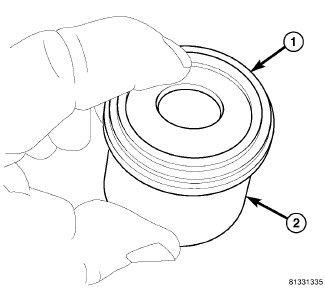
- Lubricate caliper piston, piston seal (1) and piston bore (2) with clean, fresh brake fluid.
- Install NEW piston seal (1) in groove of caliper bore (2). Seal should be started at one area of groove and gently worked around and into the groove using only your clean fingers to seat it.
- Install NEW dust boot (1) on piston (2) and work boot lip into groove at top of piston. Stretch boot downward, straightening boot folds, then move boot back upward as necessary until folds snap uniformly into place.
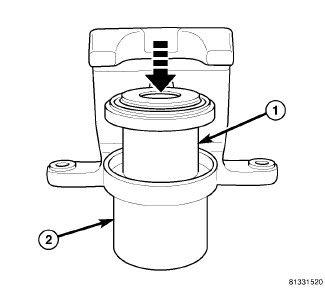
- Install piston (1) into caliper piston (2) bore, pressing piston down to bottom of bore using hand-pressure. Using a piece of wood or wooden hammer handle may also suffice as long as piston and boot damage can be avoided.CAUTION:
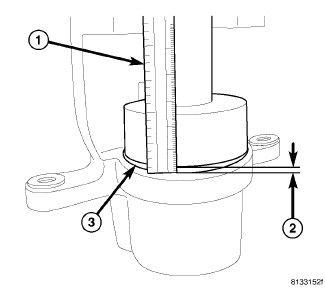
When installing dust boot in following step, use care not to over-install boot or damage will occur. The boot (3) will bottom in the counterbore before the top of the boot reaches the surface of the caliper. The boot will bottom with approximately 2 mm (1/16 inch) (2) of boot still showing above caliper housing.
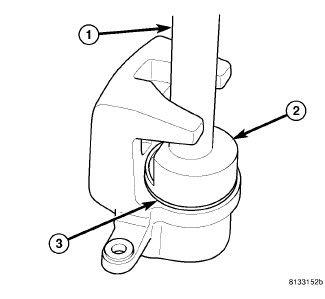
- Seat dust boot (3) in caliper counterbore using Installer, Special Tool (special tool #9314, Installer, Dust Boot), with Handle, Special Tool (special tool #C-4171, Driver Handle, Universal). Install dust boot until it bottoms. Do not over-seat dust boot or damage will occur.
- Install bleeder screw in correct threaded hole. Caliper housing is not side-specific, so it is important to install bleeder screw in threaded hole that will be uppermost once caliper is installed on vehicle. Tighten bleeder screw to the proper torque specifications. Refer to TORQUE SPECIFICATIONS .
- Install caliper on vehicle. Refer to CALIPER, DISC BRAKE, REAR, INSTALLATION .