UAS And UCS Radio Enhancements (08-102-21 REV. A)
WARNING: This page is about the Charger GT, which is a different variant/trim than selected.
Publication date: 2021-11-06Reference number: 08-102-21 REV. A
Supersedes refnos: 08-102-21
UAS AND UCS RADIO ENHANCEMENTS
TECHNICAL SERVICE BULLETIN
Reference Number(s): 08-102-21 REV. A, Date of Issue:
November 06, 2021
Superceded Bulletin(s): 08-102-21, Date of Issue:
June 22, 2021
| CHRYSLER: | 2018 - 2021 (LA) Dodge Challenger, (LD) Dodge Charger, (LX) Chrysler 300 |
| GROUP: | 08 - Electrical |
NOTE:
This bulletin supersedes Technical Service Bulletin (TSB) 08-102-21, date of issue June 22, 2021, which should be removed from your files. All revisions are highlighted with **asterisks** and include update build date and additional symptom.
OVERVIEW
This bulletin involves inspecting and if required, updating the radio software level to 39.5
MODELS
MODELS CHART
| 2018 - 2021 | (LA) | Dodge Challenger |
| 2018 - 2021 | (LD) | Dodge Charger |
| 2018 - 2021 | (LX) | Chrysler 300 |
NOTE:
This bulletin applies to vehicles within the following markets/countries: North America.
NOTE:
This bulletin applies to vehicles equipped built on or after **April 01, 2017 (MDH 0401XX)** and on or before May 24, 2021 (MDH 0524XX) equipped with a Uconnect 4C With 8.4" Display (Sales Codes UaS or UCS).
SYMPTOM/CONDITION
Customers may experience one or more of the following:
- **Performance control home screen shows "Norm" mode for engine/transmission even when the vehicle is in "Drag" mode.**
- High pitch squeal, pop or hum from all speakers.
- SXM favorite, displays empty song list.
- Intermittent, black radio display screen.
- Intermittent, radio freezes.
- Bluetooth® pairing and/or connection issues.
- Lost radio presets.
- Radio channels change by itself.
- SXM icon inoperative.
DIAGNOSIS
Using a Scan Tool (wiTECH) with the appropriate Diagnostic Procedures available in DealerCONNECT/Service Library, verify all related systems are functioning as designed. If Diagnostic Trouble Codes (DTCs) or symptom conditions, other than the ones listed above are present, record the issues on the repair order and repair as necessary before proceeding further with this bulletin.
If the customer describes the symptom/condition listed above perform the Inspection Procedure.
INSPECTION
CAUTION:
The repair procedure must be followed step by step. If the radio is not updated with the correct software level at the correct time the radio can be damaged. If the radio was damaged by not following the repair procedure the radio may need to be replaced.
- Verify the radio software version. Radio must be in Dealer Mode to verify by following these steps:
- Press and hold both lower corners of the display screen, until the Dealer Mode screen appears (approximately seven seconds). Release screen.
- Select "Radio Part Information". The software version will be listed next to "Application Version" (Fig. 1) .
- What is the radio software level (Application Version) at?
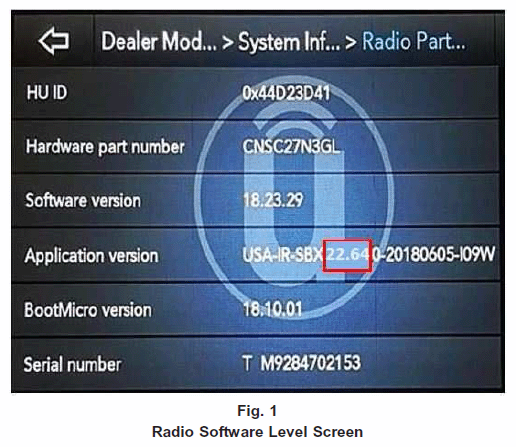
- 39.5 or higher >>> The radio software is already up to date. Normal diagnostics should be performed.
- At or above 22.64 and under 39.5 >>> Proceed to Step 1 of the Repair Procedure.
NOTE:
If this software is used on a radio with software level under 22.64, it could damage the radio. If the radio is damaged it may need to be replaced.
- Under 22.64 >>> This bulletin does not pertain to this radio. Normal diagnostic should be performed.
REPAIR PROCEDURE
NOTE:
Before and after any single phase of update is MANDATORY to take a Vehicle Scan Report by wiTECH. Scan reports can be requested during warranty claim assessment; failing to show them can result in refusing to pay the warranty claim.
- Using wiTECH create a Vehicle Scan Report and save a copy to the work order.
- Has a 4GB
USB flash drive been created?
- YES >>> Proceed to Step 10 .
- NO >>> Proceed to Step 3 .
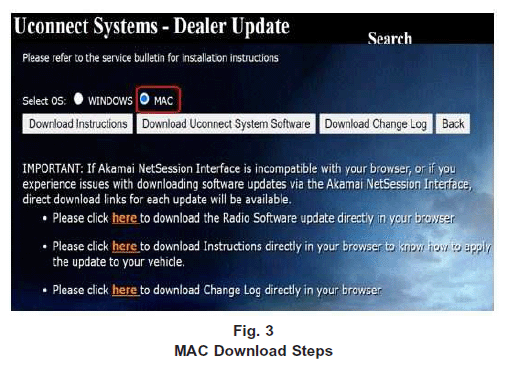
NOTE: When downloading the software file from the Uconnect site, always select the MAC version, regardless of the computer being used. - Go to DealerCONNECT>Service>Uconnect Command Center>Uconnect>More Information >Dealer software downloads to download the files.
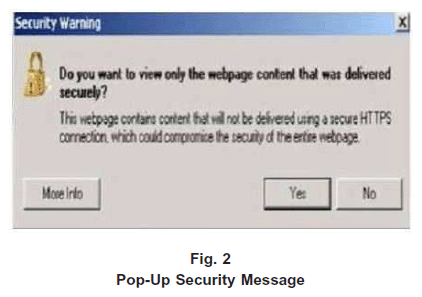
- If a security message appears "Do you want to view only the web page content that was delivered securely?" (Fig. 2)
. Press "No" to continue.NOTE: If the software cannot be downloaded, make sure you have proper security access. If not, have the Service Manager or Shop Foreman download the software update.
- Use one blank USB flash drive with at least 4GB of space for each software file. Follow the on-screen instructions to download the software files.
- Download the software update file to your local PC's desktop. Make sure to select the "MAC" radial button for all downloads (Fig. 3)
.
- Be sure to download the file to your designated folder before extracting the zip file to the blank USB flash drive.NOTE: A blank USB flash drive will be needed for each radio update, additional updates cannot be on the same USB flash drive.
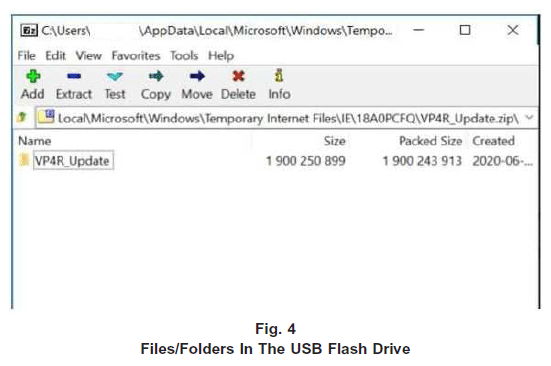
- Unzip the file to the root folder of the USB flash drive. File should not be within a zip folder. Your USB file should look like (Fig. 4)
when you open it.
- Once the file is extracted to the USB flash drive, it's recommended to label the USB flash drive with the bulletin number and proper software level.
- Start the vehicle and insert the correct USB flash drive with new software into the USB port.CAUTION: Make sure no other device is plugged into any of the USB ports while performing this update. If other devices are connected to USB ports during re-programming, it may cause failure of files to be loaded which may cause the radio to need replacement.
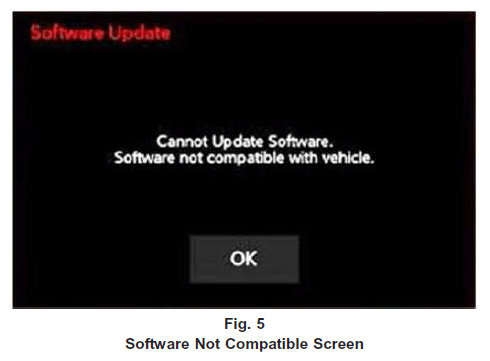
- If the screen in (Fig. 5)
is displayed, the USB flash drive was not set up correctly. Use a top name brand USB flash drive, like Kingston, create a new USB flash drive and start the update again.
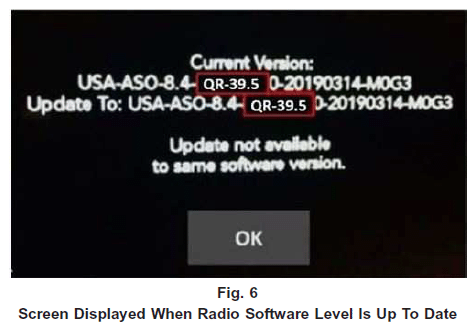
- If the radio software is already up to date, the screen in (Fig. 6)
will be displayed. Press "OK" and remove the USB flash drive.NOTE: If the ignition is turned off before the two minutes has expired, the software update will be canceled. The ignition does not have to be turned off to perform this updated (Fig. 8) .
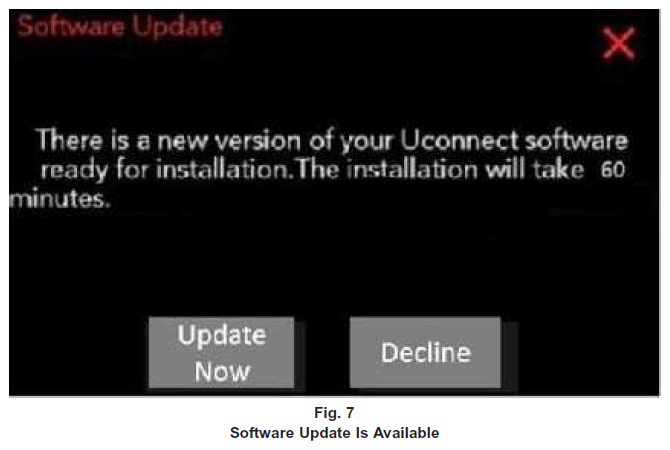
- Once the system has verified there is an available update, press the "Update Now" button. Make sure the vehicle is in park, DO NOT cycle the ignition off (Fig. 7)
.
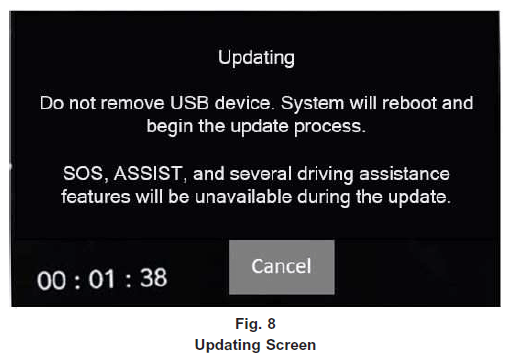
- When the radio starts updating, the screen in (Fig. 8)
will be displayed.
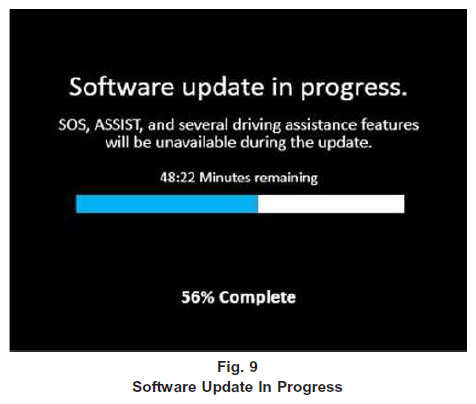
- The radio will reboot and the update will begin. The update should only take 25 minutes, the timer on the screen any display the incorrect time remaining, (Fig. 9)
.NOTE: The completion indicator may not reach 100%, even though the software update has been completed. Once the software update has finished, the radio and display screen will turn off.
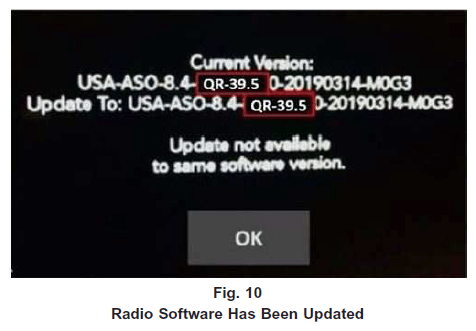
- After the update has completed, the radio will shut down. With the USB flash drive still inserted in the USB port, cycle the ignition back to the run position. If the radio software was updated correctly the "Current Version:" and the "Update To:" software levels in (Fig. 10)
will display the identical software level. Press "OK" and remove the USB flash drive.
- Cycle off the ignition, open and close the driver door and let all modules go into a sleep mode.
- Check if the navigation is working properly by pressing the 'Nav' button on the bottom tool bar. Verify the navigation map loads properly.
- If the radio or navigation software didn't update properly or the navigation map doesn't load, attempt the software update one more time. If the software doesn't update properly or the navigation doesn't work, the radio may need to be replaced.
- Using wiTECH, clear all DTCs that may have been set in any module due to reprogramming.
- Using wiTECH create another Vehicle Scan Report and save a copy to the work order.
NOTE:
After performing the radio update, the radio display screen may have a ghost image that will not clear even after cycling off the ignition. This ghost image may appear on any radio screens selected. Do not replace the radio for this concern, turn the vehicle off and allow the radio and vehicle to enter a full power down cycle. A full power down cycle may take 5 minutes.
POLICY
Reimbursable within the provisions of the warranty.
TIME ALLOWANCE
TIME ALLOWANCE CHART
| Labor Operation No: | Description | Skill Category | Amount |
|---|---|---|---|
| 18-60-02-DR | Radio, Software - Create USB Jump Drive From Uconnect Website for UAS Radio (One Time Only) (0 - Introduction) | 6 - Electrical and Body Systems | 0.2 Hrs. |
| 18-60-02-DS | Radio, Software - Create USB Jump Drive From Uconnect Website for UCS Radio (One Time Only) (0 - Introduction) | 6 - Electrical and Body Systems | 0.2 Hrs. |
| 18-60-02-DT | Radio, Check Software Level and Perform Software Update (0 - Introduction) | 6 - Electrical and Body Systems | 0.7 Hrs. |
FAILURE CODE
The dealer must use failure code CC with this Service Bulletin.
- If the customer's concern matches the SYMPTOM/CONDITION identified in the Service Bulletin, failure code CC is to be used.
- When utilizing this failure code, the 3C's (customer's concern, cause and correction) must be provided for processing Service Bulletin flash/reprogramming conditions.
FAILURE CODE CHART
| CC | Customer Concern |