Propeller Shaft: Installation: Rear
Drive shaft removal is a two-person operation. Never allow the drive shaft to hang from the center bearing, or while only connected to the transmission or rear axle flanges. An assistant is required. If a drive shaft section is hung unsupported, damage may occur to the shaft, joint and center bearing from over-angulation. This may result in driveline vibrations or component failure."
During drive shaft removal or installation avoid any contact with the front and rear joint grease caps. Any damage to the grease cap caused by improper handling during installation or removal could cause a grease leak and subsequent damage to the CV joint. Do not pull on the shaft in order to remove the front joint from the transmission/transfer case flange, this could dent or dislodge the boot and cause a grease leak and subsequent joint failure.
Drive shaft bolts must be replaced with NEW . If NEW bolts are not available clean the old bolts and apply Mopar® Lock and Seal Adhesive or equivalent.
To avoid driveline vibration or damage, it is critical that all components are reinstalled in their original orientations.
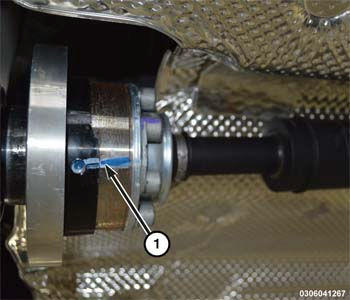
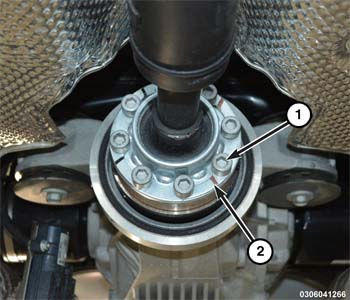
- With the aid of an assistant, install the drive shaft into position at the axle flange and align the index marks (1) made upon removal.NOTE:
Drive shaft bolts must be replaced with NEW . If NEW bolts are not available clean the old bolts and apply Mopar® Lock and Seal Adhesive or equivalent.
- Install the drive shaft to axle flange washers (2) and NEW
bolts (1) by hand. Do not tighten at this time.NOTE:
Drive shaft bolts must be replaced with NEW . If NEW bolts are not available clean the old bolts and apply Mopar® Lock and Seal Adhesive or equivalent.
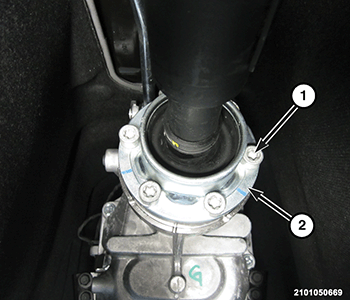
- Install drive shaft into position at the transmission flange. Align index marks made upon removal. Install the drive shaft to transmission flange washers (2) and NEW
drive shaft bolts (1) by hand. Do not tighten at this time.
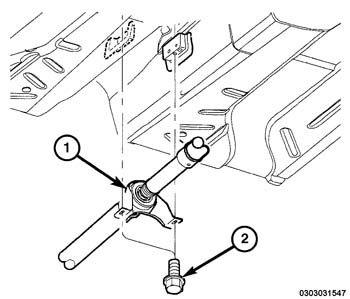
- Position the center bearing (1) in place and loosely install the center bearing to body bolts (2) by hand. Do not tighten at this time.
- Tighten the drive shaft to transmission flange bolts (1) in a star pattern to 66 Nm (49 ft.-lbs.).
- Tighten the drive shaft to rear axle flange bolts (1) in a star pattern to 66 Nm (49 ft.-lbs.).NOTE:
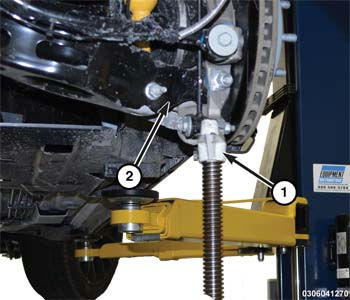
Note: It is necessary to compress the rear suspension to ride height before securing center bearing to body. Failure to compress the rear suspension may result in objectionable noise and premature bearing wear.
- If a drive-on hoist is not used, compress the rear suspension (2) using screw-style under-hoist jack stands (1).
- Tighten the center bearing to body bolts (2) to the proper torque specifications. Refer to TORQUE SPECIFICATIONS .
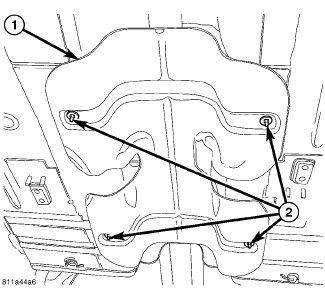
- Install the heat shield (1) and the heat shield nuts (2).
- Install the rear exhaust system. Refer to MUFFLER, EXHAUST, INSTALLATION .