Cylinder Head: Removal
- Perform the fuel system pressure release procedure. Refer to FUEL DELIVERY, GAS, STANDARD PROCEDURE .
- Disconnect and isolate the negative battery cable.
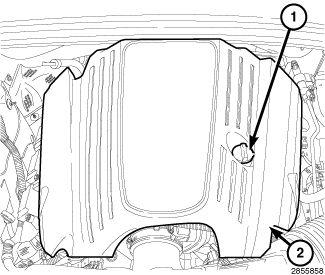
Remove the engine cover (2).
- Remove the intake manifold. Refer to MANIFOLD, INTAKE, REMOVAL
.
- Raise and support the vehicle. Refer to HOISTING, STANDARD PROCEDURE .
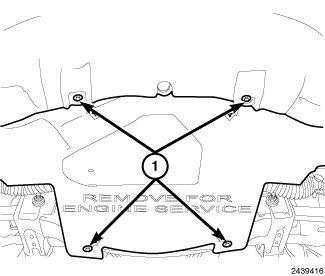
- Remove retainers (1) and the belly pan.
- Drain the cooling system. Refer to STANDARD PROCEDURE
.CAUTION:
When separating the catalytic converters from the manifolds, disconnect the oxygen sensor connectors. Allowing the catalytic converters to hang from the oxygen sensor wires damages the harness or sensors.
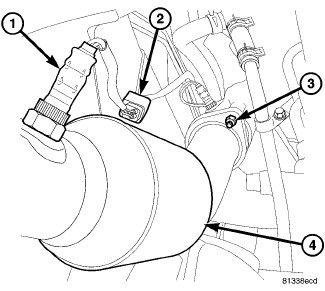
NOTE:Left side shown, right side similar.
- Disconnect all oxygen sensor wire harness connectors (2).
- Saturate all exhaust bolts and nuts (3) with Mopar® Rust Penetrant. Allow five minutes for penetration.
- Remove nuts (3) and separate the catalytic converters (4) from the exhaust manifolds.
- Remove support and lower the vehicle.
- Remove the serpentine belt. Refer to 5.7L/6.4L ELECTRONIC POWER STEERING, REMOVAL .
- Remove the cylinder head cover. Refer to COVER(S), CYLINDER HEAD, REMOVAL .
- If removing the right cylinder head, remove nut and the oil dip stick tube.CAUTION:
Pushrods and rocker arm assemblies must be installed in their original locations or engine damage could result.
NOTE:Make sure to identify the original location of the rocker arms and push rods for correct assembly.
- Remove the rocker arms and push rods. Refer to ROCKER ARM, VALVE, REMOVAL
.
NOTE:
It is not necessary to remove the exhaust manifolds to remove the cylinder heads.
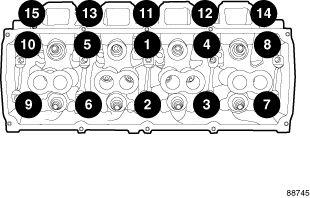
- Using the sequence shown, remove the cylinder head bolts and remove the cylinder head(s).
- Remove and discard the cylinder head gasket.
- Inspect and clean the cylinder head (2) mating surface.
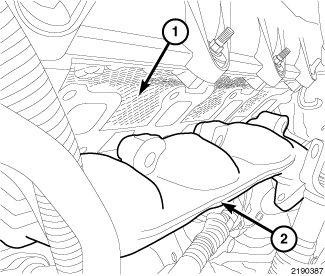
- If necessary, remove bolts and the manifold (2).